Your RV takes you to various places for your adventures. And one of the best things you can do on your travels is to enjoy kayaking in a river, stream, lake or beach. But the problem is, if your RV doesn’t have a place for your kayak, you need to create one.
In this post, we will teach you how to build a kayak rack for an RV.
Table of Contents
What Are Required to Build an RV Kayak Rack

Your DIY vertical kayak rack for RV requires certain materials to complete. Let’s go ahead and check what items are required to complete a kayak rack for your camper.
- Removable connector or pin end
- Rubber gloves
- 6’-4” long 2”x6” wood boards
- long 2×2” steel angle iron
- Cleaning materials
- ¾’’ PVC tubing
- 2”x12” boards
- Measuring tool
- Screwdrivers
- Bolts
- Hand drill
- 6’ long 1” steel angle iron
- 6” long 3/4” PVC pipe (2 pieces)
- Foam pipe
- 3/4” PVC fittings
- 3/4” PSI PVC pipe
- 3/4” EMT steel pipe
- Spring pin
Note: The above items should fit two 8-ft kayaks.
Step by Step Instructions on How to Build an RV Kayak Rack

The good thing is you don’t need to be an expert builder to build an RV kayak rack. You simply need to follow the instructions below.
Step #1: Check RV capability of carrying a kayak
Before you start building a kayak rack on your recreational vehicle, make sure that your camper can carry the extra weight. Keep in mind that the rack must be built on the exterior of your RV.
A leisure kayak weighs up to 100 pounds, while a fishing kayak is around 120 pounds or more. And to be safe, it’s best to check if your RV can handle an extra 150 pounds baggage.
You can find the answer to your query from the RV’s owner manual. Or you can ask an expert about RVs regarding your concern.
Step #2: Decide where to build the kayak rack
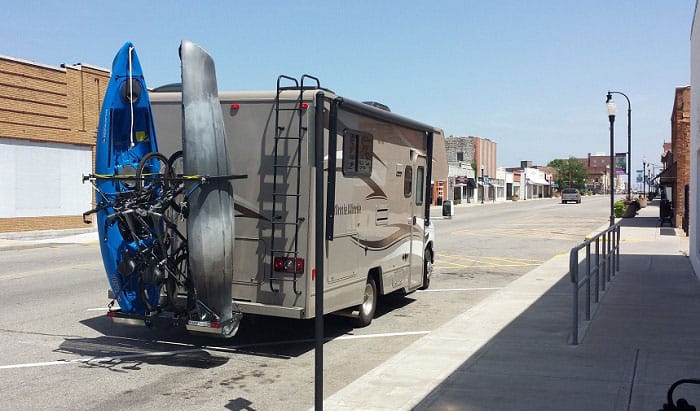
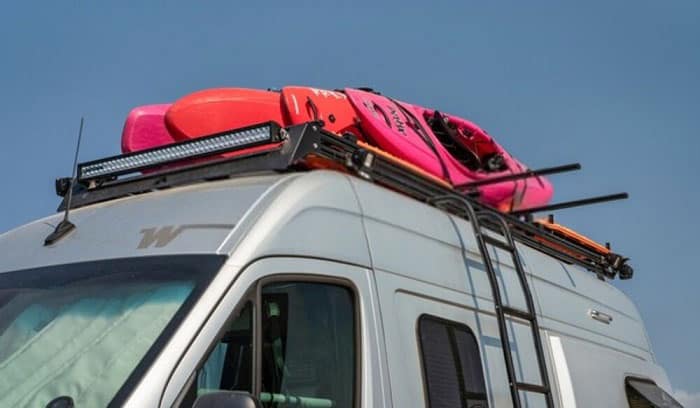
Your 5th wheel kayak rack plans must include where to build the rack. Many RVers opt for roof racks, especially when they have a smaller camper.
However, the rear of your motor home is ideal if you have a bigger and taller RV, since it’s hard to bring down a kayak from a tall camper. In this post, you’ll learn how to build vertical kayak racks.
Step #3: Determine how many kayaks to bring
Kayaking is absolutely amazing, especially when you have a partner in your hobby. And so in your plan to build a kayak rack, determine first how many kayaks you will put on your rack.
But just to be on the safe side, it’s best to go for a dual kayak rack, even if you only have one kayak. You never know when the time comes when you need to store two kayaks on your RV.
Step #4: Make the measurement for available space
The best kayak rack for camper is one that is totally suitable in terms of dimension and compatibility. So make it a point to measure the available space on your RV roof or back side. You must know exactly the size of rack to make to avoid waste of money, time, and effort.
Step #5: Gather the materials for a kayak rack
Once you have the right size of the rack, it’s time to gather everything you need to build the kayak rack for travel trailer. Also, clean out the RV exterior. Use your favorite cleaning materials and wear rubber gloves to perform this task.
It’s imperative to install the rack on a clean surface to see things clearly while you work on your project.
Step #6: Reinforce the RV bumper
Many RV bumpers are not strong enough to handle the weight of kayaks, so it is best to reinforce the bumper. In reinforcing the bumper, put on a bumper sleeve, which you can build using 6”-4” long 2”x6” wood boards and 6ft. long 2×2” steel angle iron.
Glue them together and bolt the sleeves to form an “L” shape on the bumper.
Step #7: Create the kayak pads
Using 3/4” PVC tubing and 2”x12” boards, make kayak pads that will support the weight of the kayaks. Install the pads underneath the newly reinforced bumper. Remember to place the kayak pads to the bumper sleeve and bolt them securely.
Double check for loose connections to ensure the safety of the kayaks.
Step #8: Create a camper back wall attach bar & kayak connected hold down bar
The next step is to create a camper back wall attach bar using a 6’ long 1” steel angle iron. Take note that this attached bar does not carry the weight of the kayaks.
And then build a bumper for the attach bar using 2 pieces of 6” long 3/4” PVC pipe, which is covered with foam pipe.
With the use of a 3/4” EMT steel pipe, 3/4” PSI PVC pipe, 3/4” PVC fittings, and spring pin, build a sturdy kayak connected hold down bar.
With all the components created, you should now have a kayak rack.
Conclusion
This guide about how to build a kayak rack for an RV is intended to help you save money in installing a means to carry your kayak. It’s extremely important to securely install the RV rack in order to feel confident in driving while your kayak is attached to the camper.
And now that you have a clear picture on building a vertical kayak rack for RVs and campers, please share this post. We’d love to hear your ideas for making a combination kayak and bike rack for RV as well.

Hi, I am Joseph. Carpe diem! Seize the day! That’s always been my life motto. If you haven’t seen some of the most beautiful places in the country, you are missing out on incredible adventures.

